Go With All Your Heart ❤️
- Jules

- Aug 18, 2020
- 3 min read
Hi there! It's Julissa here on the Sassy & Crafty Blog today to share a fun card using a combination of THREE fun Sassy & Crafty products! I love mixing sets and showing how to maximize your stash. For this card, I used the amazing new Paper Creator - Floral stencil (and I'll share how easy it is to use!), the Floral Thank You stamp set and Color My World Sentiment set.

Let's start with this awesome stencil! I think this is just the coolest because you can use whatever colors you want to make a fun, floral background. Here's my little step by step process on using the Paper Creator - Floral stencil.
Step 1: I started by cutting a blue 6" x 6" piece of card stock (it was in my scrap pile). I made an "X" in the middle to help guide where I put the card stock I'm going to be stamping on. Then I adhered a piece of 4.25" x 6" piece of white card stock (that's just what I had cut next to me) in the center of my X'ed paper. From there I picked four Distress Oxide colors (one for each element on the stencil) : Candied Apple, Abandoned Coral, Peacock Feathers and Twisted Citron. With my white card stock temporarily adhered to the blue 6x6 card stock, I lay on the stencil and color each element.

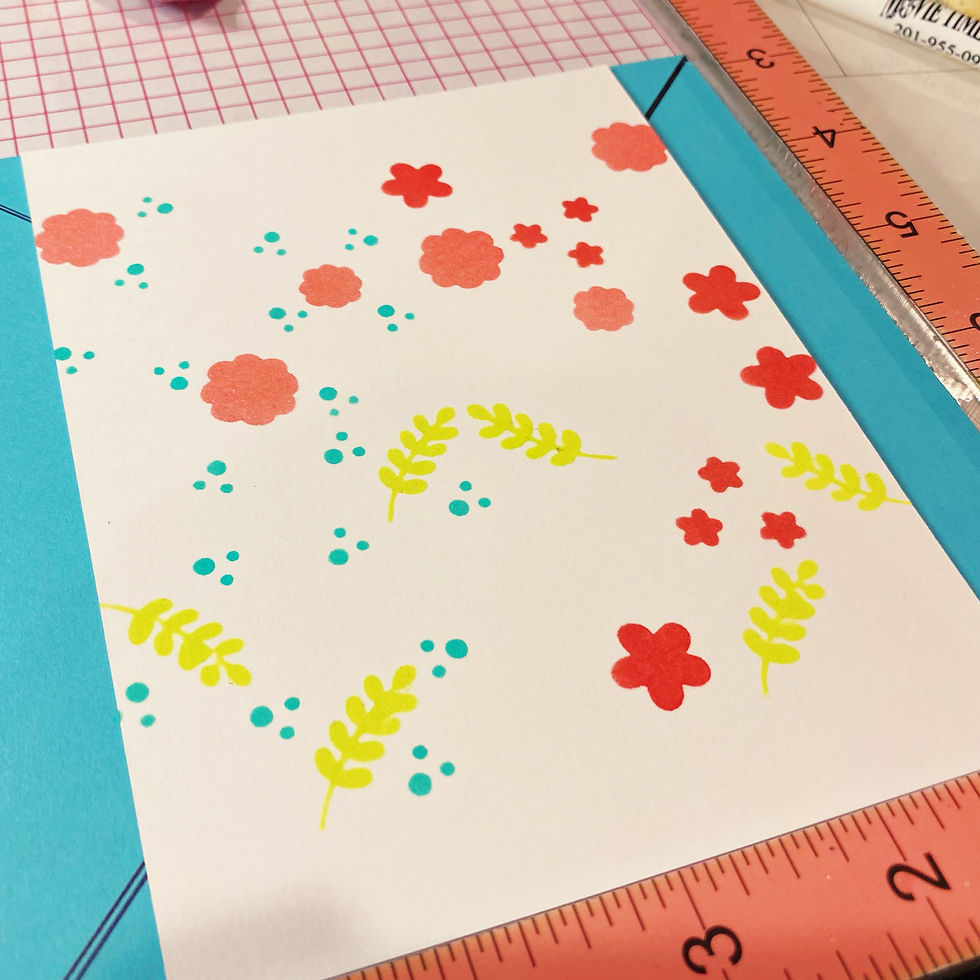
Step 2. Once all four colors are on and each piece is colored, you can pick up the STENCIL only and rotate it 90 degrees in any direction, but you'll need to keep going in that direction for the following two turns to get the full design. Now that you've rotated the stencil one time, color those same spots the same colors as last time. (Photo below shows the stencil in the first rotation over the first layer.)

Step 3: As you continue to rotate the stencil, you'll see that the images have their own space at each turn. Slowly filling the page and creating a fun custom patterned paper.

Step 4: On your 4th and final turn, once you're done coloring in the images... your paper is ready! The final product is a beautiful, colorful 4.5" x 4.5" patterned paper.

I chose to cut up this beautiful piece. It wasn't as hard to cut this pretty paper because I knew I could make it over and over again! Using a heart die, I centered it and cut out a heart. This die had a scalloped heart. And rather than trying to find matching card stock, I used Candied Apple Distress Oxide to color a white piece of card stock and made the scalloped heart for the background.
As I was laying it down, the stark white card base seemed boring, so I pulled out the Floral Thank You stamp set and used the little leaf. I stamped it all around the card base using the Twisted Citron Distress Oxide and it was subtle enough to not take away from the heart. I also stamped the sentiment from the Color My Life Sentiment stamp set. in the lower right hand corner. Leaving enough room to adhere the heart on the left side.

Adding a few simple and subtle embellishments, and this card is ready to go wherever you send it... with love.
Thank you so much for stopping by and I hope to see more of your creations mixing and matching your favorite Sassy & Crafty stamps and stencils! Make sure to post your cards on the Sassy & Crafty Inspiration Club on Facebook!
Until next time... Have a Sassy & Crafty Day!
Jules


Comments