


Beginning Today
- Jules

- Jan 11, 2020
- 4 min read
It's a new year and there is just so much to celebrate! If you're like me... you invested during some of the great crafty sales at the end of the year and have some new fun stuff in your craft stash. However, my new year's resolution was to use more of my old crafty stuff... including paper and tools I haven't used. With that being said... let's get to the cards!
Just this week, Unity Stamp Co. had their first new release for the year celebrating Angela Ryan-Magnuson's birthday! If you haven't heard of Unity Stamp Company... you must CLICK HERE, LIKE NOW!!! I am so proud to be part of their design team and recently posted two cards using the newly released "Beginning Today" stamp set. Here's how each of these were made.

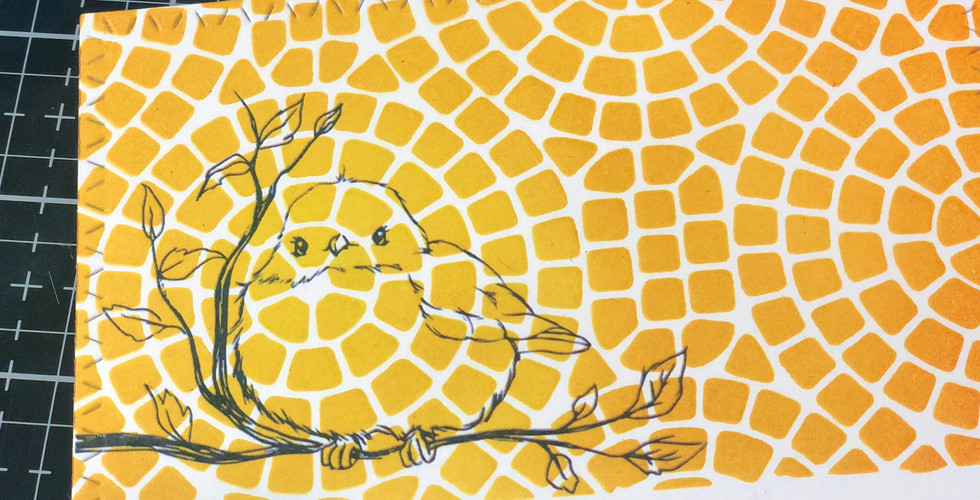
Let's start with the cute bird on the mosaic background. Here are the supplies you'll need for the first card:
- Unity Stamp Company "Beginning Today" digital cut file (and a digital die cutting machine such as a Cricut, Silhouette or comparable)
- Bristol Smooth Paper
- Die cut or trimmer. I used Gina Marie Designs Slash Stitched Rectangle Dies
- Blendable Inks - I used Distress Inks: Mustard Seed, Wild Honey and Spiced Marmalade
- Blending brush
- Markers or other coloring medium. I used Copics: B37, B23, B21, YR04, Y38, Y17, E54, G28, G17
- Foam squares or foam tape.
- Light tack tape, such as purple tape or microporous tape.
- Card base
- Adhesive
Step 1. Trim your paper or use a boarder die to cut your paper to size. I used the Gina Marie Designs Slash Stitched Rectangle Dies to cut the paper after I colored, but I don't recommend that. Die cut or trim your paper before you start.
Step 2. Stamp your bird and sentiment onto your die cut paper. You'll be layering it later with another copy of the bird.
Step 3. Upload the "Beginning Today digital cut file to your cutting machine program. I used my Cricut and cut out the image of the bird. I usually will then stamp on scrap paper, line up the stamped image through the cut out image from the die cut and place the cut image in the space to stamp it in line. (Here's a great video to watch on how to use these digital cut files: https://www.youtube.com/watch?v=kHdNHECFUsE&t=278s)
Step 4. Color your background using the mosaic stencil. Lay your stencil over the image while protecting the sentiment. Secure the stencil to the card stock with purple tape. I colored the image to look like a sunrise. Yellow around the bird, then a brighter orange and then a rich orange. Remove stencil when done.
Step 5. Color the cut out bird image.
Step 6. Adhere the background to the card base.
Step 7. Add foam squares to the back of the bird and place over the bird on the card stock.
By using a stencil vs. just blending colors, you give a lot more detail to the card without too much dimension. And the raised bird keeps this cutie as your focal point. Below are some step by step images that will provide some visions for these steps.


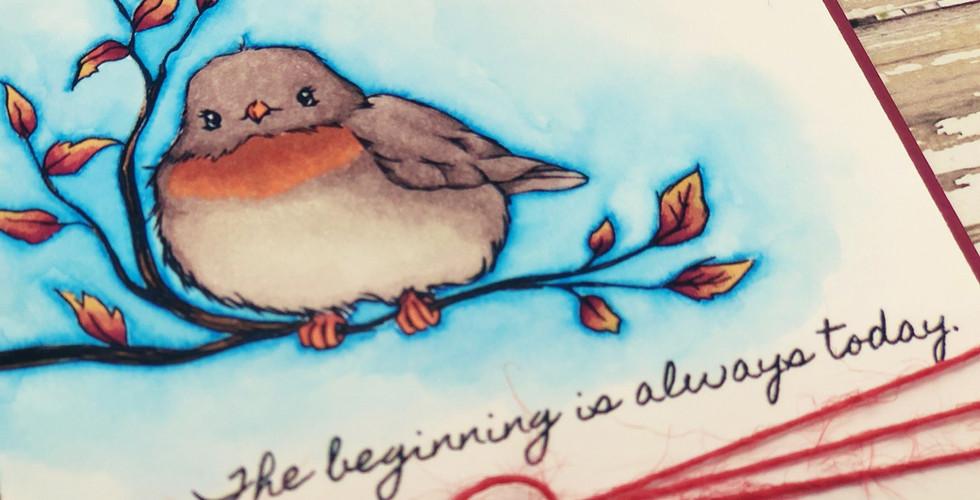
For the second card... it was a lot simpler.

Supplies used are listed below:
- Bristol smooth paper
- Arteza Brush Pen in Blue (there's no names on mine but there is a pic below. You can also use Zig Brush pens or and water soluble ink.
- Watercolor pen or thin paint brush to watercolor.
- Small container of clean water.
- Copic Markers (Colors used - Bird: E79, E77, E74, E71, W1, 0, E08, E99, YR68 Branch: E57, R89, E08, YR23) or any other coloring medium.
- Dark Orange Twine
- Card Base
- Adhesive
Step 1. Trim paper as desired. You can use a die, but I opted for a clean cut.
Step 2. Stamp your bird and sentiment using a hybrid ink so that you can use both Copics and your Brush Pens.
Step 3. Using the Arteza brush pen, lightly trace around the image in a small section. Quickly take your paintbrush with water and gently push the color away from the image. Careful to not wet inside the image so the color doesn't bleed in. Continue to traces sections and blend. As long as sections are wet, they will continue to blend to avoid harsh lines. This is always a challenge for me, but by working quickly, it turned out great! Once you've finished coloring around the whole image, let it dry.
Step 4. Color in the bird. I used Copics, but you can use the brush pens, colored pencils or any other mediums you enjoy working with.
Step 5. Tie the twine around the card stock and make a bow.
Adhere to the card base and you're card is complete! Pretty clean and simple on this one, but it packs a punch with the blended watercolored background.


Thank you so much for following along and I hope you all enjoyed the creation of these cards. If you were inspired by these cards, I encourage you to share you card or project and please tag @UnityStampCo and @PaperGemsByJules on your Instagram or Facebook.
I hope you all have a wonderful, crafty day!
Happy Crafting!


Comments