


Subtle Skies
- Jules

- Aug 21, 2020
- 2 min read
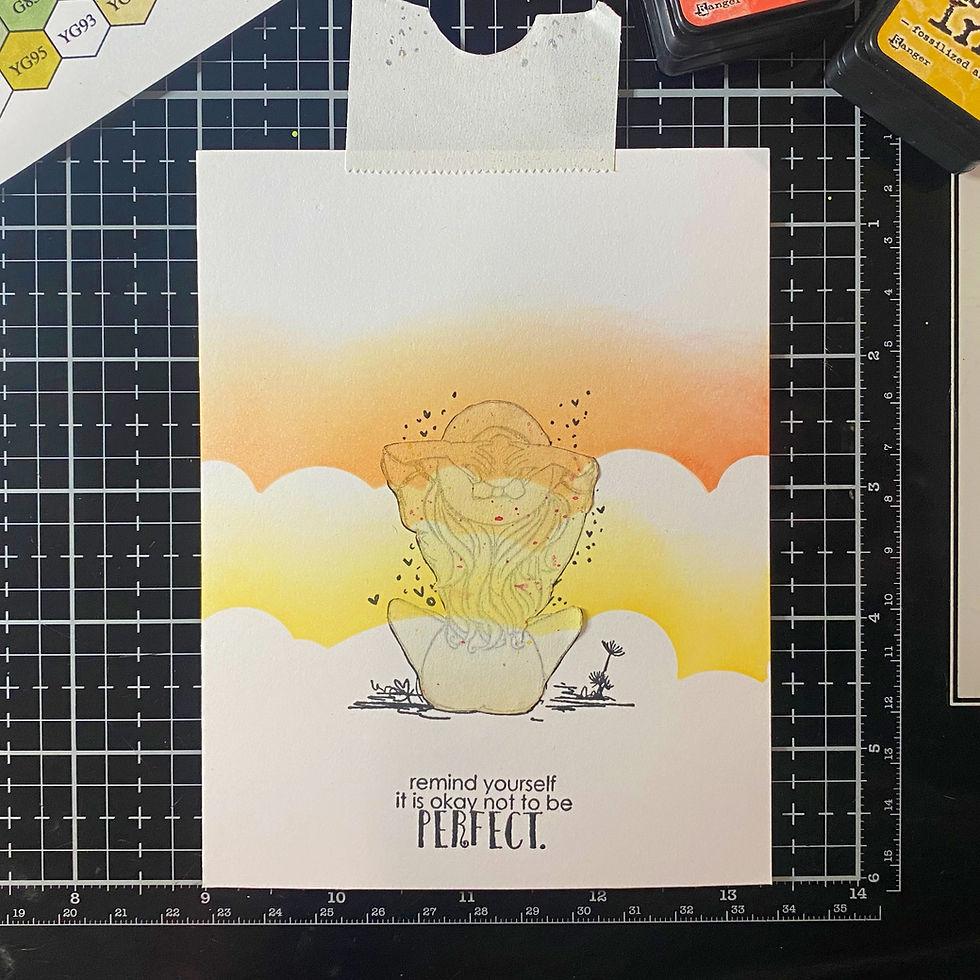
Happy Friday! It's Jules of Paper Gems by Jules here to share a great new way to make a subtle sky as a backdrop to your next card using the new Cloud & Wave Stencil. Using this Itty Bitty stamp set called "Not Be Perfect" you can create a big scene.

Here's a step by step view on making this subtle, grungy background scene.
Step 1. Stamp the image and sentiment using a Copic friendly ink on a Copic friendly paper and a paper that allows for distress ink (or similar) or oxide ink blending. I used Bristol Smooth paper and Momento Tuxedo Black ink.

Step 2: Create a mask for the girl and place it over her. I used Post-it Removable Label Tape.

Step 3. I taped a piece of scrap paper to cover the wave portion of the stencil, just in case. Next, I lined the stencil up to the floor of the scene and held it in place.

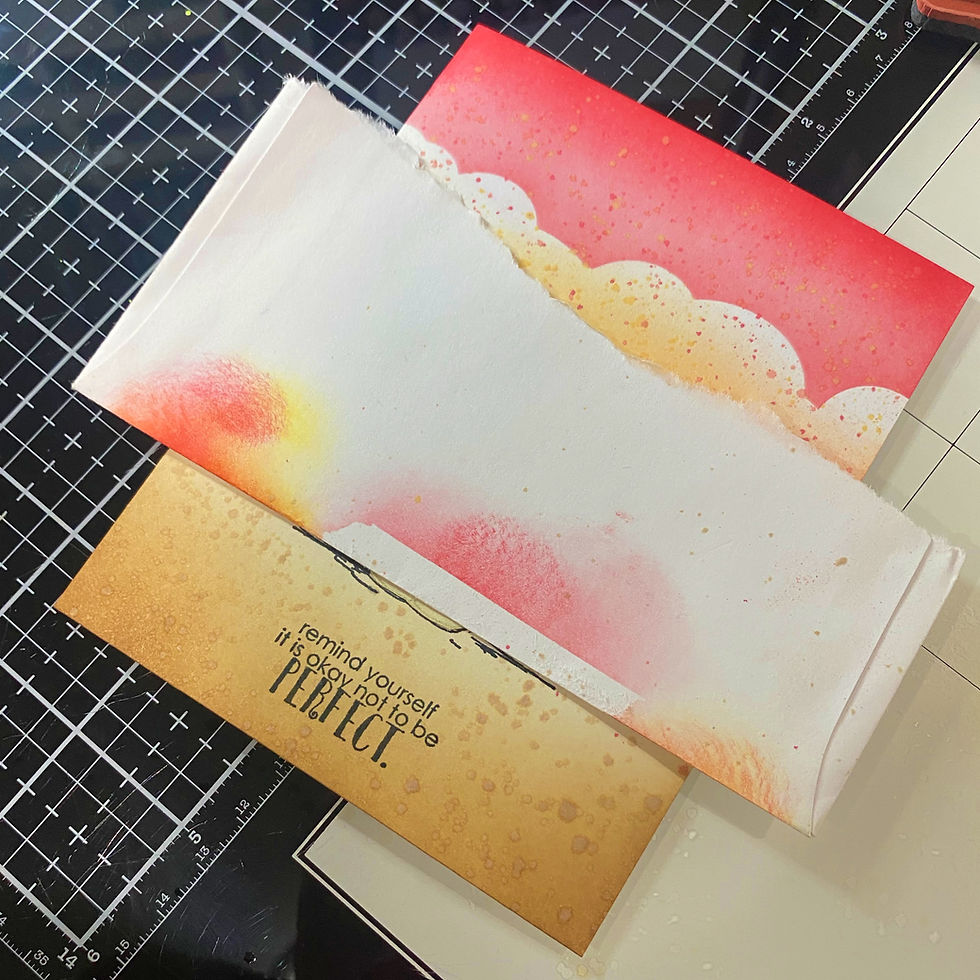
Step 4: Using a blender brush, I gently added the first color of ink: Distress Ink in Fossilized Amber.

Step 5: Move the stencil up to the white area, turning it 90 degrees and moving the scrap to cover the wave portion, I added the next color: Distress Ink in Ripe Persimmon. Using the same technique, I added the next color: Distress Ink in Candied Apple.
Step 6: Now to grunge it out a little... let's add some splatters. I put the ink on my glass mat, sprayed it with water, picked it up with a small watercoloring brush and splatted it on the card. I did this with all three distress inks used for the sky. I used that same piece of scrap to cover the bottom half to color it separately.

Step 7: Using Distress Inks Antique Linen and Vintage Photo to create the sandy floor, I did the same grungy effect with Vintage Photo splatters.
Step 8: Once all dry, I removed all the masking and colored the girl.
Copics Used: Bathing Suit & Ribbon on Hat Ribbon - R35, R14, R32 / Shirt & Hat - W5, W3, W1, W00 / Hair - E59, E57, E25 / Skin - E97, E53, E21

Step 9: Final steps were to die cut this card layer. I adhered it to a slightly larger piece of white card stock and used foam tape to adhere it to the card base. Done and done!

I am loving these new stencils and can't wait to try the wave portion of it. Seriously, two stencils in one, what a deal!! I hope you found some inspiration for your next creative venture. Please remember to post your work on the Unity {Show & Tell} Facebook page.
Thanks for stopping by and have a crafty day!
Jules


Wow! This is so be! I love your step by step!!!! Love this stencil too! I bought I recently