


Twinkle Toes Gets Lit

Okay, crafty friends… I think this little reindeer just took “holiday sparkle” to a whole new level!
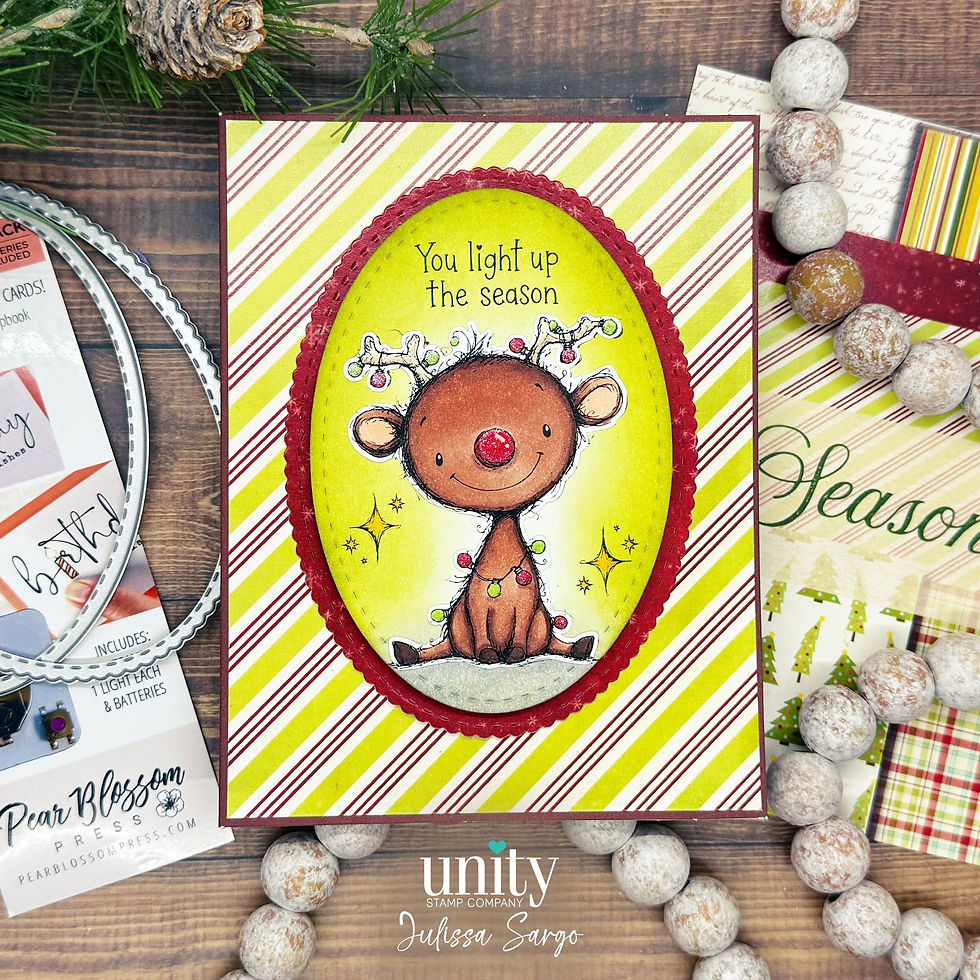
When I saw the adorable new Twinkle Toes stamp set, I knew this sweet little guy needed to be the star of a Christmas card. But instead of simply giving him a shiny red nose, I decided to make his nose actually LIGHT UP! ❤️💡
And the best part? Adding a light-up feature is much easier than you might think!
For this card, I used a Pear Blossom Press One Light, which is an all-in-one light-up unit with the LED, button, and battery included—so there are no circuits to build or soldering required.

Meet Twinkle Toes!
I started with a traditional Christmas color combination of lime green, candy-cane red, and snowy white. The striped patterned paper makes the perfect festive background and really lets our little reindeer take center stage.
I stamped Twinkle Toes and colored him with my Copic markers, giving him warm brown fur, rosy cheeks, colorful Christmas lights, and, of course, that fabulous bright red nose.
Then came the fun part…
Making Rudolph's Nose Glow!
Here’s how I added the interactive element:
Plan the light placement first.
Before permanently adhering anything, I positioned my reindeer where I wanted him on the card and marked exactly where his nose would sit.
Create the opening for the light.
I made a small opening directly behind the red nose so the LED from the One Light could shine through.
Position the One Light.
I adhered the light to the back of the card front, lining the LED up with the opening behind his nose. The One Light is designed to simply adhere in place, making it a wonderfully easy way to add an interactive element to a card.
Make room for the light.
I used foam adhesive to create enough dimension behind the card front so the light and button had room to do their thing. This is an important step—don't squash your light! 😉
Add the “PRESS” area.
I positioned the button where it could be easily pressed through the front of the card. You'll want to make sure your recipient knows where to push.
Test, test, TEST!
Before sealing everything up, I pressed the button to make sure that little red nose lit up exactly where I wanted it.
And then… MAGIC!
Press Rudolph's nose and suddenly our little Twinkle Toes is glowing!
Pear Blossom Press specifically recommends testing the placement of the light and button during assembly, and using dimensional adhesive to give the light room beneath the card layers.

A Little Extra Holiday Sparkle
For the focal point, I layered the reindeer onto a bright green oval panel with a scalloped red mat. I added a touch of sparkle to the snow beneath his feet and some little starbursts around him to make the scene feel even more magical. The sentiment, “You light up the season,” couldn't be more perfect for this card! And let's be honest…when a card literally lights up, you HAVE to use that sentiment. 😂
My Favorite Part?
It's watching someone press the button for the first time.
They see a cute Christmas card…
They press the nose… AND IT LIGHTS UP!
That's the kind of handmade-card magic I absolutely love creating. ❤️
If you've never tried a light-up card before, I hope this project convinces you to give it a try. The Pear Blossom Press One Light makes the process surprisingly simple because the LED, button, and battery are already together in one unit. So grab your favorite interactive supplies, find a stamp that deserves a little extra attention, and let your creativity shine! Because sometimes a handmade card doesn't just send a message… Sometimes it lights up the whole season. 🎄
Products Used
Copic markers
Black Copic Friendly Ink
Glitter Brush Pen
Adhesive
Paper trimmer
Die-cutting machine
A Little Tip Before You Go
If you're new to light-up cards, plan the mechanics before you glue your layers together. The light and button need to be positioned intentionally, and you'll want enough space for the mechanism between your layers. Once you get the hang of it, you'll start looking at every stamp set and wondering, “Hmmmm…what could I make LIGHT UP?” 😜
Happy crafting, friends—and may all your holiday cards twinkle just a little brighter!


Comments