


Snowbert Says, “Hello, My Friend!” ☃️

There’s just something about a big, cheerful snowman that makes winter cardmaking more fun—and Snowbert from Unity Stamp Company definitely brings the personality!
For this card, I wanted Snowbert to be the star of the show, so I let his size take center stage. He is a BIG image, and I thought the easiest way to show just how large he is was to use the Postage Stamp Nesting Dies as a frame. The largest die gives you a great reference for just how much of an A2 card Snowbert fills!

Creating the Winter Sky
I started with a piece of white cardstock and used Salty Ocean Distress Ink to create a soft blue gradient. I kept the color lighter toward the bottom and worked into a deeper blue toward the top to give the background a little more dimension.
Then came the snow!
I used Picket Fence Distress Spray Stain to add snowy splatters across the background. And let's just say...I may have gotten a little enthusiastic with the splattering! 😂
A few of my splatters turned into what I lovingly call GIANT SPATTER ERRORS. You know the ones—those enormous blobs that definitely weren't part of the original plan!
But that's one of my favorite things about cardmaking: there's almost always a way to fix it.
Instead of starting over, I simply incorporated those "oops" moments into the design. A little strategic placement of the snowflake, Snowbert himself, and the sentiment helped disguise the biggest offenders. Once everything was assembled, those giant splats just looked like intentional, extra-large snowflakes!
Crafting lesson of the day: Don't throw out the background! Sometimes your mistake just needs a little embellishment.
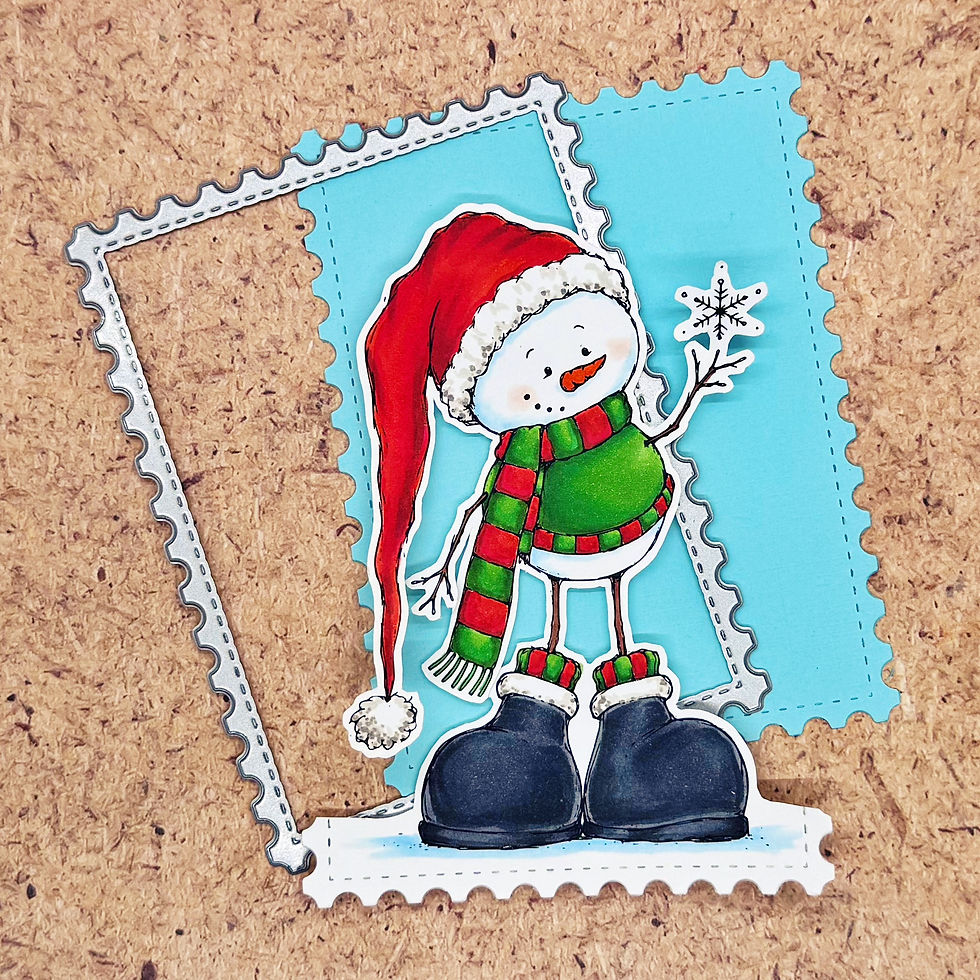
Meet Snowbert!
I colored Snowbert with bright, traditional holiday colors—cheery red, vibrant green and deep navy—to really make him pop against that icy blue background.
His oversized Santa hat and striped scarf give him so much personality, and I love the little snowflake he's holding. The “hello, my friend.” sentiment was the perfect finishing touch because Snowbert definitely looks like he's ready to greet someone with a big wintertime hug.
I added a touch of sparkle to the hat and snow-covered areas with Stickles, because a snowman deserves a little sparkle!

A Few Layers Make a BIG Difference
The Postage Stamp Nesting Die was also a fun way to add some detail around the card without taking attention away from Snowbert. I layered the blue postage panel over a patterned background and added a silver-gray mat to frame the whole design.
And now you can really see just how BIG Snowbert is!
He's practically taking over the card—and I think that's exactly what makes this stamp so much fun.

Products Used
Unity_ Snowbert
White cardstock
Patterned paper
Silver/gray cardstock
Copic Markers: E09, R27, R08, R05, R14, R00, B41, 0, W4, W2, E25, YG67, G07, YG17, N9, N7, N5
Don't Let the Oops Stop You!
If there's one thing I hope you take away from this card, it's this: don't be afraid of the happy accident! That giant splatter that looks like a disaster when it happens can often become part of the design with a little creativity. Add an embellishment, cover it with a sentiment, tuck something over it—or just call it snow! ❄️
So grab your Snowbert stamp, some Distress Ink and your favorite coloring markers, and let this big guy take over your next winter card!
After all, every friend deserves a handmade hello.


Comments